This thread was originally posted on SMC by Jim Mumford. It is here with his permission.I was looking for a way to construct a set of folding and telescoping legs to level my pbb at any work site, match to different tables, and make it easily storable and moveable.
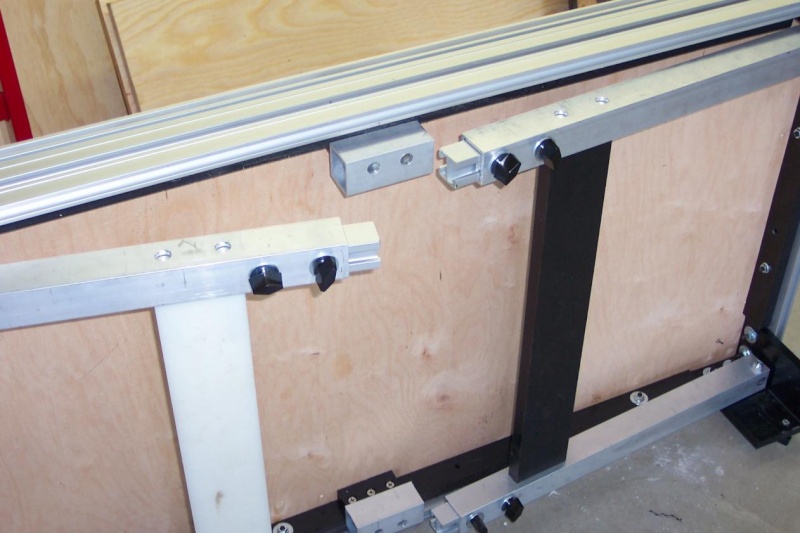
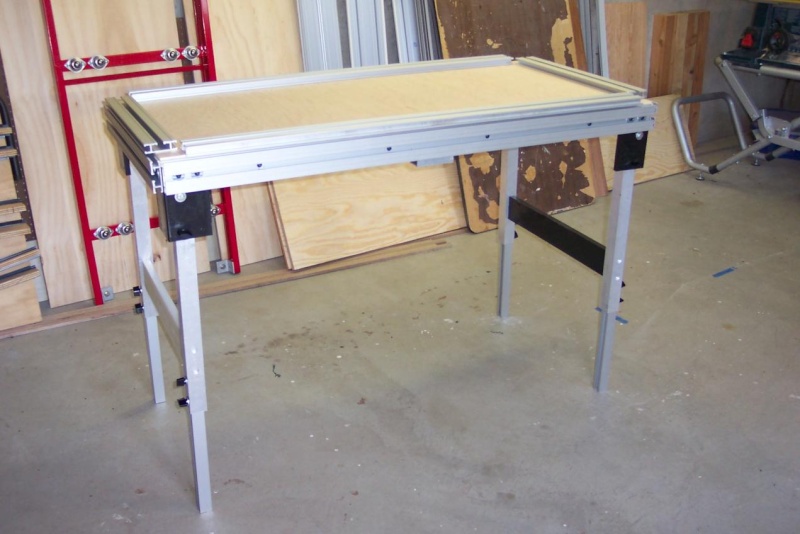
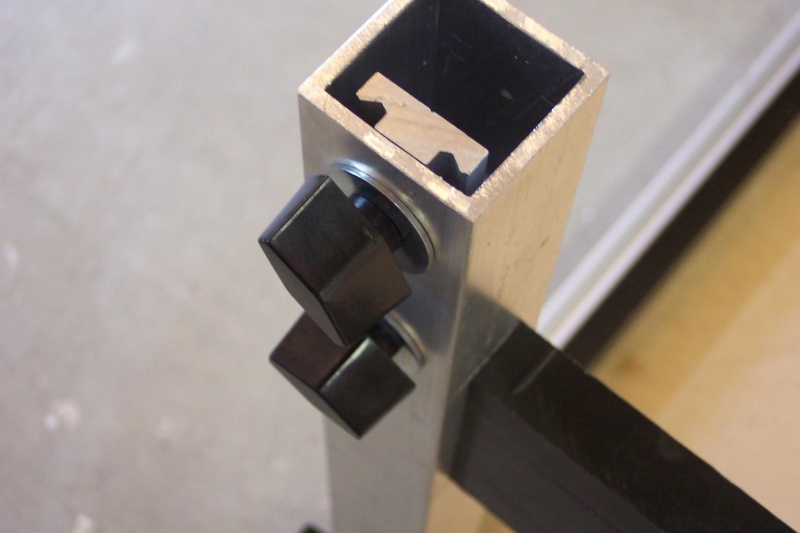
What I built is based on a B2B extrusion sliding inside 1.5" x 1/8" wall rectangular aluminum tube, joined with 3.5" long connector extrusion inside as shown in the last pic. It seems to make a nice and strong join, with a wide range of continuous adjustability.
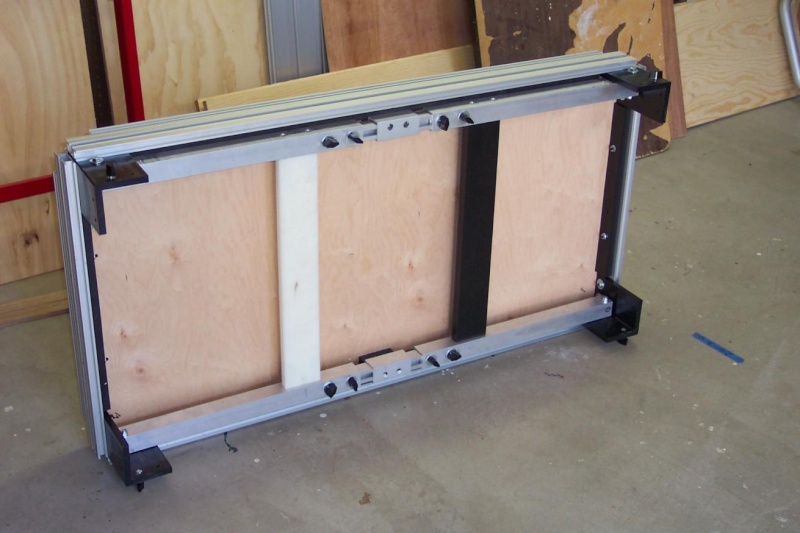
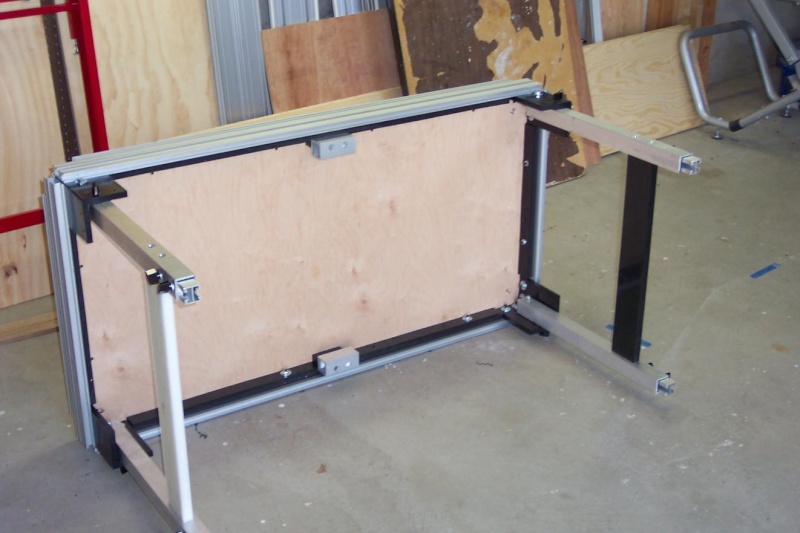
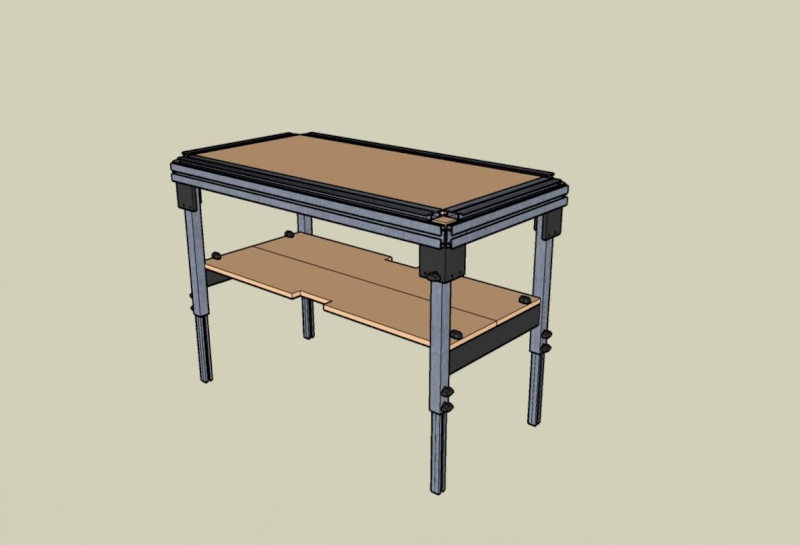
Height range of the bench turned out to be from 25" at the low to 40" at the high. I had no particular goal, just to push the range as far as possible. The UHMW crossmembers are for stability and to support a plywood shelf. The shelf can also store under the folded legs for
transport. The short tube mounted in the middle makes a good hand-hold for carrying, and holds the legs in the folded position guaranteeing that they can't come loose when being banged around.
One HDPE is white b/c I blew a cut and had to canabalize an HDPE cutting board to keep going.
I'm considering a next version, still folding but with SME's down the sides of each leg to support add-ons, similar to how Burt does it on his excellent table.
thanks,
-Jim
 Dik Harrison Posted: Great design
 Jim,
What if for your next version, you used B2B for both pieces, then you would not have to add SME for clamps, etc., and would save weight?
Jim Mumford Replied:Dik,
B2B's as both pieces mean a connector ext. in between them to adjust the length. A connecor extrusion is prone to a little bit of flex that I didn't want in a bench leg. Even if you use two. I also believe I worked through the cost and my way turned out less expensive ( like
that's ever mattered since I found Eurekazone...


)
Also, I kept thinking about the legs being inset from the plane of the SME's around the edges of the hybrid by 1/2"(corner UHMW) 3/4(SME)". I'm favoring adding SME's or a SME/B2B combo at right angle to each other on each leg with appropriate spacers. That would bring the slots flush to the SME's already there without having to build in an offset to every add-on you make.
The legs aren't that heavy right now actually, so for me adding more aluminum would be OK.
thanks,
-Jim
Dik Harrison Replied:Sounds goodJim,
I see your reasoning and agree. maybe I'll incorporate these legs when I build my Smart table replacement. Right now it just sits on saw horses and they make things awkward sometimes. Thanks for your ideas...
Mike Goetzke Posted:Jim - I like you leg design. I currently have my PBB on a cable lift that stores it at garage ceiling level when not in use. It works great for saving space, but, when I need to make a quick/not planned cut I hesitate to use the PBB because it takes a little time to set it up. My
bench also has the sliding modules. I find I don't move them around very much for work support - I have set them up for a 4' square top and have left it that way. Your lightweight/portable design would make my life EZ-ier.
Do you know how much your bench weighs?
Thanks,
Mike
Burt Wadell Posted:Jim,
That is a very nice looking table. The leg design is unique and appear to be quiet functional. How sturdy is the table?
Burt
Jim Mumford Replied:
Do you know how much your bench weighs?I don't offhand but I will make an attempt to weigh it and post what I find. By feel, it seems not a lot more than just the table, as I was hoisting it around to put the legs on. Surprise to me, the UHMW seemed to add the most weight. Maybe hardwood stringer with some sort of tight knock-down connector instead for the next one....the black looks cooler though...
 How sturdy is the table?
When the two knobs on the legs are tightly snugged, which is key, I can sit on the table. I did a mock-up with one knob and it wasn't good enough, so two is the way to go. As far as side-to-side deflection, no worse than the 3x3 wooden legs I had lagged to the UHMW. The pinning mechanism that holds them open is a metal insert through the UHMW which comes through inside and is then filed down until the leg comes square to the table in that direction against it, and then square the leg to the top in the other direction, clamp it, drill it, and then run a 1/4-20 tap through the insert and into the side of the leg material to make the threads match. Then the knob sort of pulls everything together when tightened. It is OK, I think on the next one I will change the mechanism to make them even tighter. The advantage is you can leave the knobs in the corner inserts when the legs are folded, one less thing to worry about.
I imagine when I get the shelf built and installed, it might add a *bit* more stability..
I see your reasoning and agree. maybe I'll incorporate these legs when I build my Smart table replacement. Right now it just sits on saw horses and they make things awkward sometimes. Thanks for your ideas...Thanks to your excellent Sketchup models of all the EZ components I lifted off of your Google post, I was able to work through a lot of issues before buildling anything. Mucho thanks!
 Do you know how much your bench weighs?
Mike,
I removed one of my two-leg assemblies from the pbb and weighed it. 6.5 lbs per two-leg assy built with a UHMW cross brace. 13 lbs total added to whatever the pbb hybrid weighs (sorry, all I can find around here is a fish scale so I can't weigh the whole thing).
I would guess using wood instead of UHMW crossbrace might decrease it a lb. or two for each pair.
Found a scale. pbb is 52.5 lbs with the legs as built.
-Jim
