This thread was originally posted on SMC by Trent Flemming. It is here with his permission.
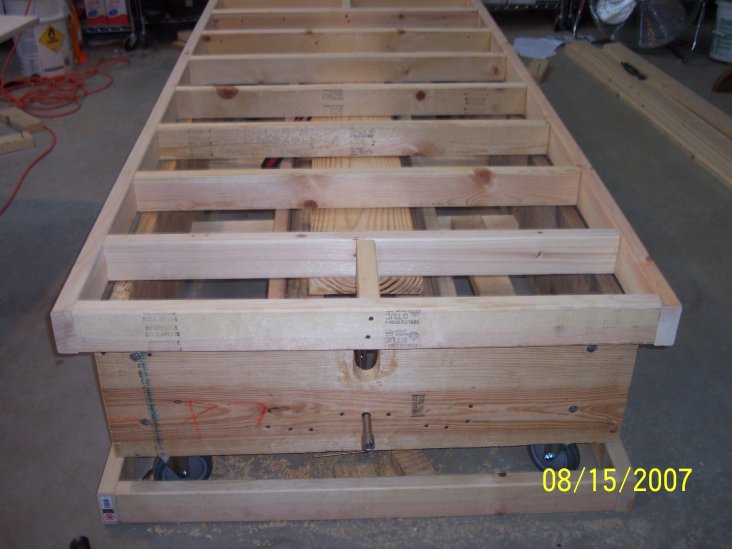
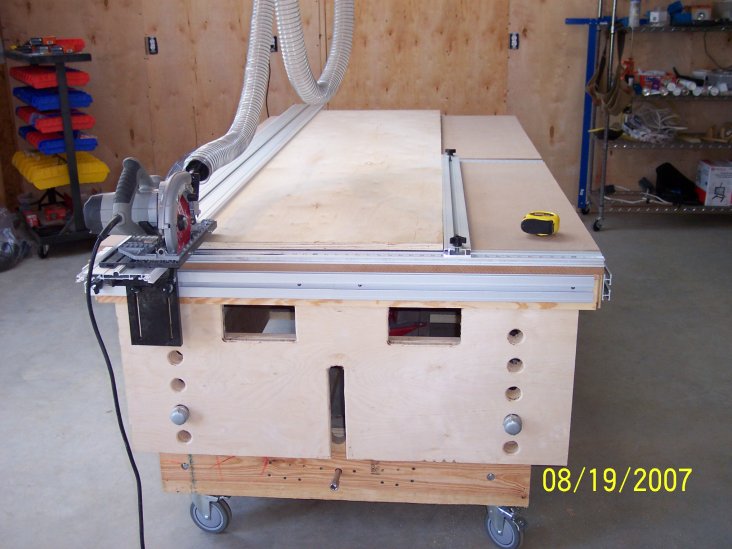
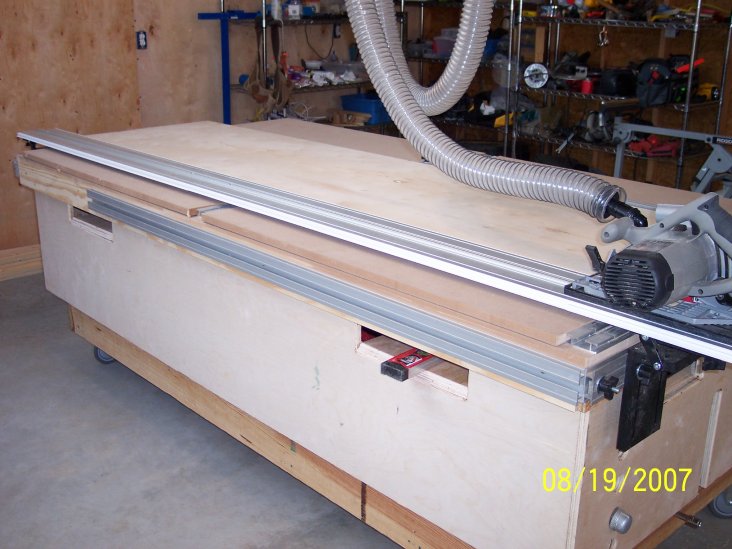
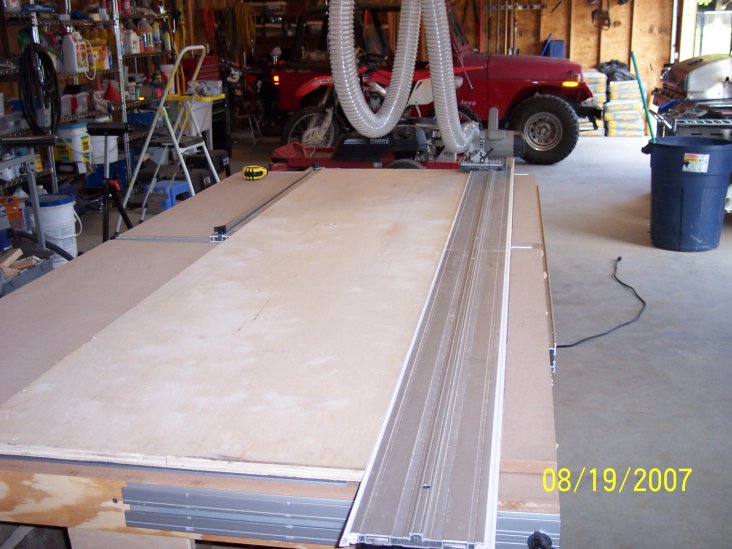
Hello All, I would like to introduce myself and share pictures of my PBB. My name is Trent Flemming and my profession is healthcare administration. I have dabbled in woodworking for the past 10 years. Nothing major because until recently I didn't have the space for wood working equipment and my small table saw was never accurate enough to make me happy. We decided to remodel the house and I wanted to build the kitchen cabinets but I told my wife I will need some space to work. The next thing I know we are pouring a slab in the backyard and I trying to decide which table saw to purchase as the centerpiece. I wanted a nice one "expensive" that would provide accurate cuts. During the shop construction phase I was searching eBay for table saws and ran across Dino's PBB. I watched the videos, lurked on this forum for a bit and then took the plunge. This was difficult at first after lusting over Powermatics and finally having one within my grasp to back up and say, nay I will try this new fangled Ez Smart tool instead. While I just finished my PBB this weekend, I did use the saw rail to help with the construction phase of the PBB and I love it. The cuts are exact, the safety is wonderful, and the finished cut is excellent. I have already forgotten about the TS. My bench was designed to perform double duty as an adjustable height work table and PBB. It will probably receive some updates in the future as I learn more about the system and how to make it work for me the EZ way. Anyway, the overall table design I grabbed from a woodworking magazine. Let me know what you think.Trent Flemming
Brian Willan Posted:
Great WorkTrent
That is a great looking PBB. I was wondering the overall dimensions of it? It looks like 36"x84" or so.
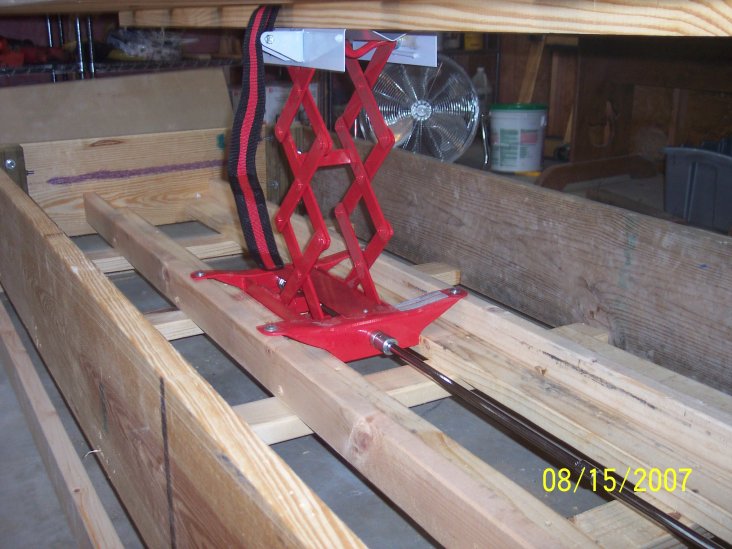
How well does that scissor lift work for the height adjustment given the size of the top? It looks rather heavy being constructed with the 2x4 frame that was pictured.
Good work.
Cheers
Brian
Patrick Anderson Posted:Nice job there mate....makes notes of the ideas
Bruce Benjamin Posted:Really nice work, Trent! Very impressive table design. I'm sure you'll get a lot of very productive work out of that one. Where did you get that scissors lift from and how much did it cost? VERY

!
Bruce
Trent Flemming Replied:Sorry, I should have given the dimensions. The table top surface is two layers of full size MDF which are 49" x 97". I screwed the bottom layer down and then fit the top layer in between SME's. This way if I mess up the top layer with glue or tons of cuts I can easily replace it, secondly I do not have any screws in the top 3/4" of the table for the blade to strike other than where the SME's are bolted down. The scissor jack is from Harbor Freights on sale for $59.00. I use an impact wrench (500 ft lbs) to raise and lower the table. My Dewalt couldn't muster the job after the top was added. The table height range is 22" to 38". Originally I tried to use a floor jack to lift the table as this was the design in the magazine, but I wasn't able to get enough travel in the jack when the table was in the lowest position to engage the
hydraulic jack. Thank you for the kind replies.
Trent
Les Spencer Posted:Trent,
Mind sharing your thoughts on the advantages of making the table height adjustable? Also was wondering why you enclosed the sides?
Trent Flemming Replied:
Hi Les,
Great questions. My reason for the enclosed sides was to stablize the table top while in a rasied postion. I would imagine that somebody with more creativity than myself could figure out a way to keep the system adjustable and have the sides fully open. The reason I wanted an adjustaable hieght was mainly for my future cabinets construction. I was thinking that during sanding or carcass construction there may be times when I would like to lower the table to improve my reach. Such as when I'm installing the drawer slides.
Thanks
Trent
Dave Lame Posted:Where you get table design?
Hey Trent,
Love your table. Where did you get basic design?
Tks
Dave
Trent Flemming Replied:
Hi Dave,
My idea came from Wood Magazine, America's Best Home Workshops. Their was only a few pictures of the bench. However, there were some incredible workshops in the magazine. Here is the link.
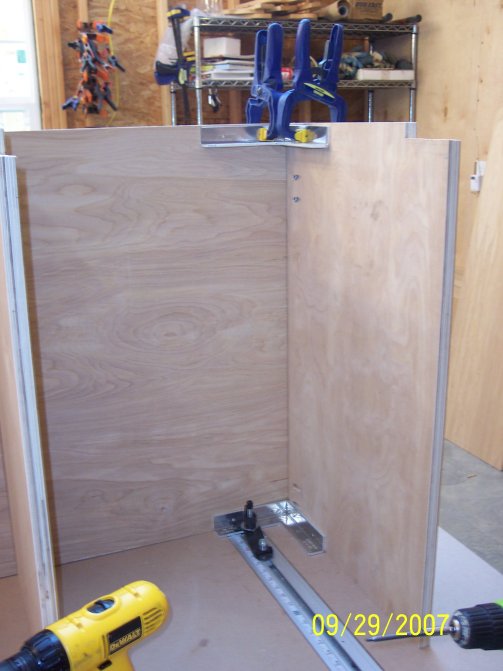
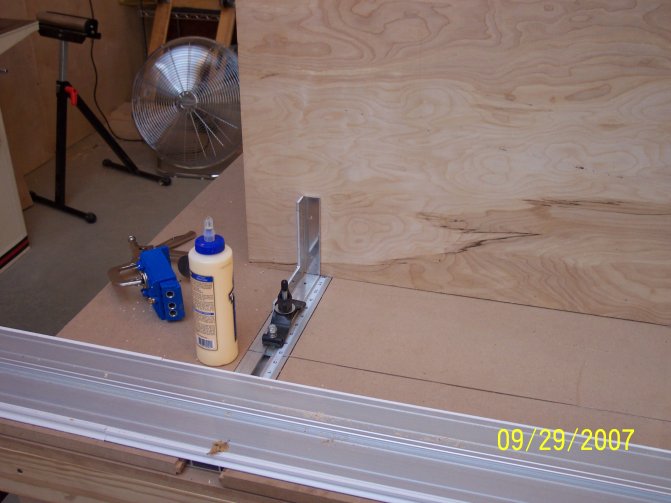
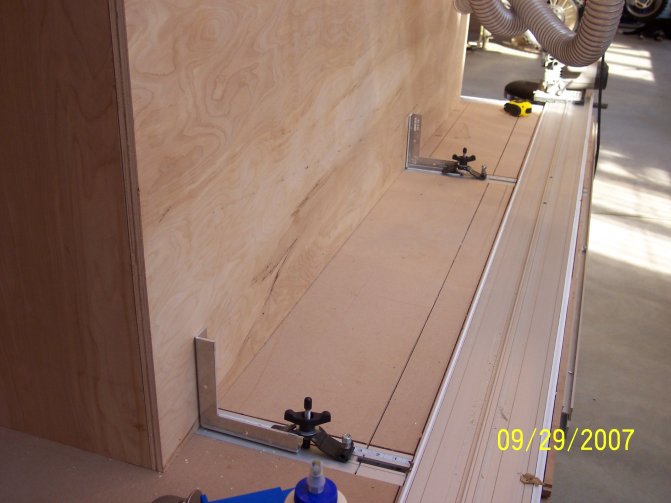
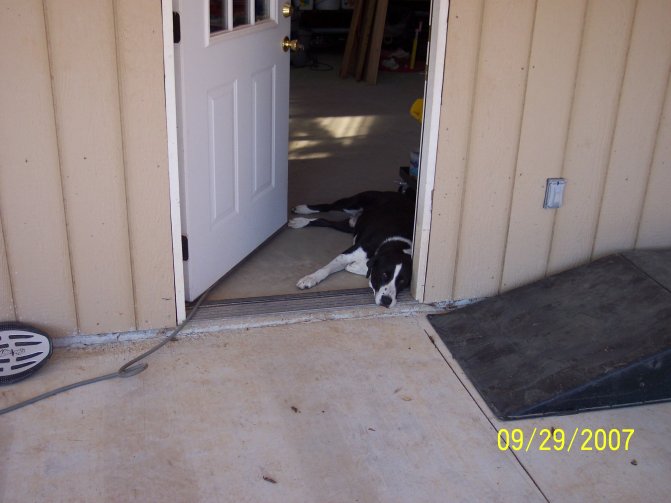
http://woodstore.woodmall.com/ambehowo.htmlHere are few more pictures of my PBBB and my faithful guard dog. I am putting together a small desk, so I lowered my PBBB and used the SME and some clamps to help hold pieces square. I would like to have some clamps that fit in the SME but will swivel 360 degrees. Anybody have any suggestions.
Trent
 Mike Goetzke Posted:
Trent - I already have a 3'x6' workbench with bench dog holes and a twin screw vise. I recently built a PBB but can't seem to find an area to squeeze it into my tool filled garage shop. The more I see your PBBB the more I like it. Just wondering:
1) Would it be possible to store hand tools etc. inside of it?
2)Is it easy to move around?
3)Would you do anything different if you built another?
Oh, back to your question. I was thinking of modifying some channel locks, like the ones sold for the Kreg system or drill press hold downs, with some connector pieces so they could easily clamp to the SME's. See my post today about the Kreg video.
Mike
Michael Lutz Posted:Trent,
According to another thread, Dino says the smart clamps can rotate 360 degrees. I guess you would need to remove the bolt which holds the arm in place. I haven't actually done it, but maybee someone else has.
Mike
John Seiffer Replied:Yes, that's exactly what you do. Works great.
Ed Peters Posted:Is there a way for the unenlightened
to find out what a PBB and an SME are?
Ed
Bruce Benjamin Replied:

 http://www.eurekazone.com/
 All products are displayed and sold here along with explanations. At the top of this forum is a stick post with explanations too but the first stop for anyone should be the EZ website. After you get a feel for the basics this forum is the place to ask questions. There's a lot to it all but it's not hard to get used to.
Bruce
Trent Flemming Replied:
Hi Ed,
PBB, I believe it stands for Power Bench Bridge or maybe Power Bridge Bench. I refer to my table as the PBBB because I added a Biesymer fence. PBB is basically a table to mount the saw guide and SME, since the EZ Smart system is so verisatile you will seem many different
configurations. I can completely understand your confusion, it wasn't that long ago I made a post very similar to yours. The EZ Smart stuff is a different way of thinking and some of the names are confusing. One of the members mentioned that the "SME" is probably not the most
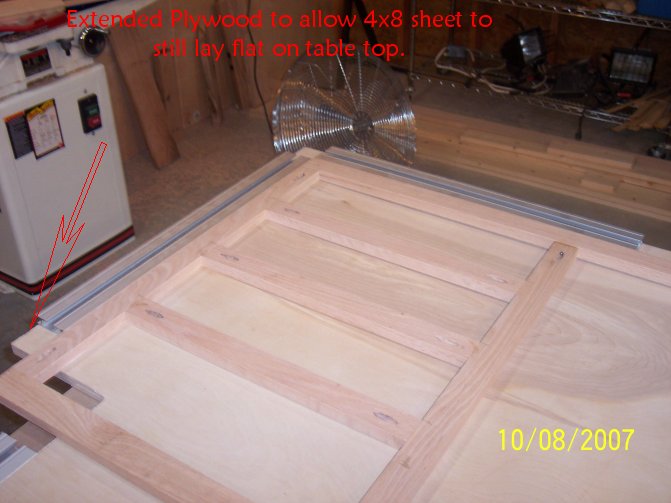
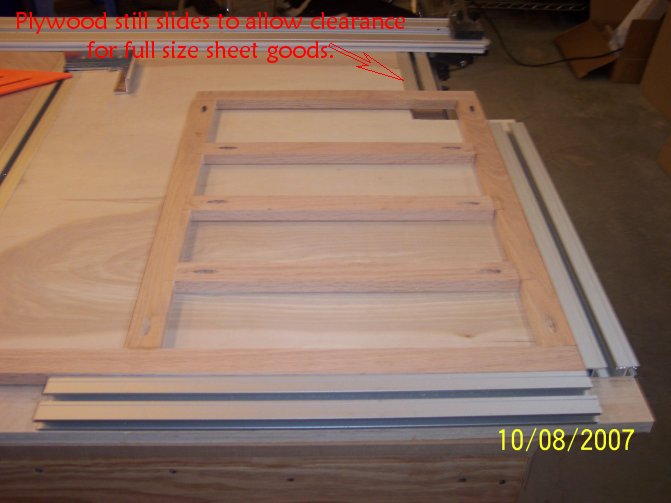
accurate name for the part of PBB that allows plywood pieces mounted between the SME (extruded aluminium T track pieces) to slide left or right, which basically extends table top surface. SME stands for Sliding Module Extension, but it doesn't slide. Just hang in their and
you find the method to best fit a PBB into your shop.

You should check out all the different PBB in this
link. Burt has several different PBBs.
Hey Mike,
1. I think the design could be modified to allow storage underneath. I think the main problem would be when you lowered the table. You would need to keep the storage bins recessed to slide into the base. This could be accomplished by hanging the bins from the underneath of the table top joists. However, my table top is already pressing limits of the scissor jack, you could use a hydraulic jack or just one table top surface.2. The table is fairly easily to move around. I used 4 inch casters that swivel 360 degrees and when locked they also lock the swivel action. Therefore when I get the table in position I only have to lock two wheels to hold it in place.3. I would probably try to incorporate the underneath storage area. I would have used 2x8 for the base instead of 2x10. A downdraft section would be a nice touch in one corner of the table. I would add more SME to the top. Probably every 2 feet I would cross the table. The benefit is smaller pieces of plywood to slide and more places to clamp during glue ups. Something I did that may not be readily noticeable in the pictures is I made the structure that holds the table top 4 inches smaller than the MDF. (Didnít realize the MDF is oversized, meant for it to be 3 inches smaller). This allowed me to attach a 2x4 to each side of the table and a Ĺ piece of plywood so that I would have a place to clamp material. For instance when I use the jigsaw I clamp the wood to the edge of the table. Thanks for the heads up on the Kreg clamp. That is exactly what I'm talking about, but I dont' see how the smart clamps can to the same thing. I post in another thread asking Dino to explain. I'm going to go check the harbor freight clamp after work and see if it will work.
http://www.harborfreight.com/cpi/cta...emnumber=47429 Edit "Nevermind my local HF doesn't have it in stock."
Update
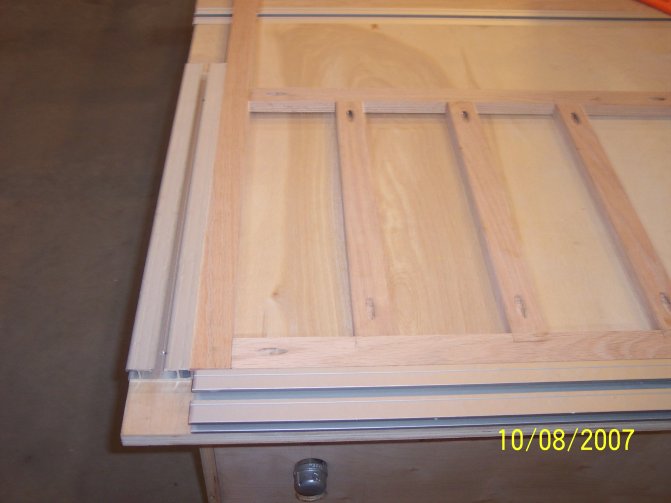
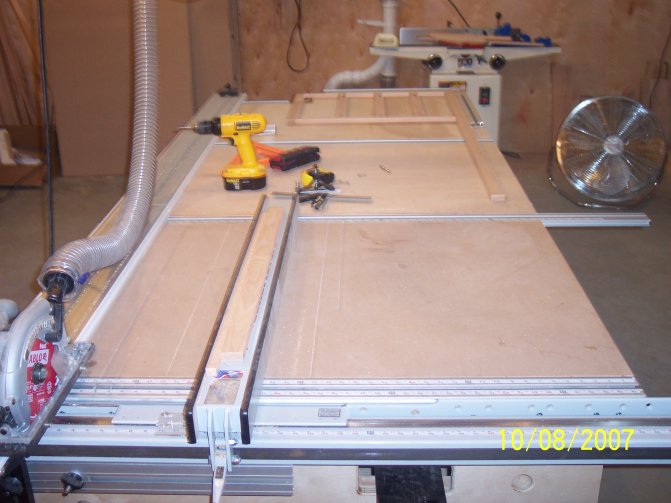
A place to build face frames. After watching the video on the Kreg Clamping table, I decided to save $250.00 bucks and add this feature to the PBBB. I used two 24" SME pieces to create a right angle just like on the Kreg system. I will probably purchase a couple of the Kreg clamps becuase they look really handy.
Trent
 Doug Rogers Posted:Get a package of stop too!
Trent,
Get a package of the Kreg stops while you are at it! (a pack of 5 is $14.99) Well worth the price. The stops are marked to perfectly center your rails over the center of the Kreg clamps.
Doug
