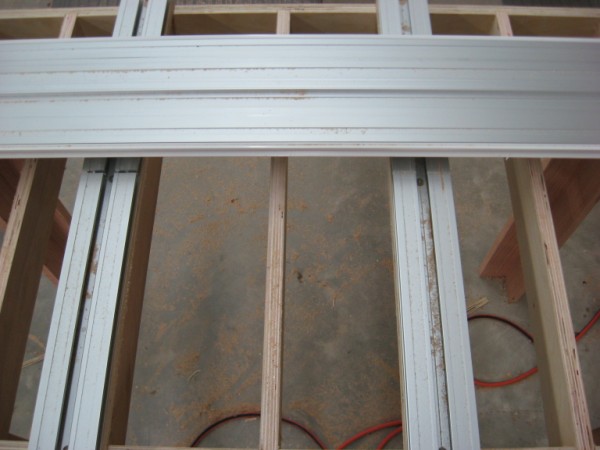
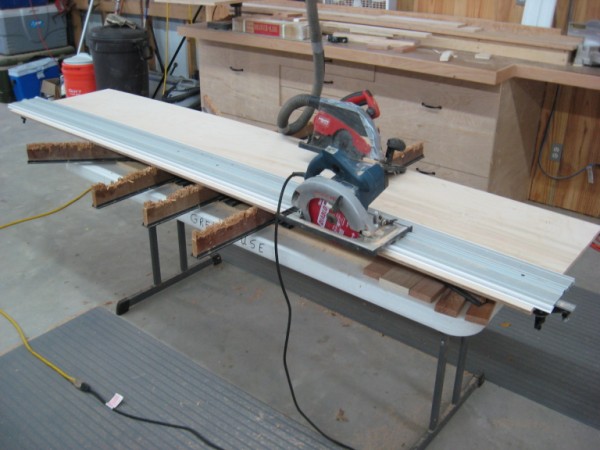
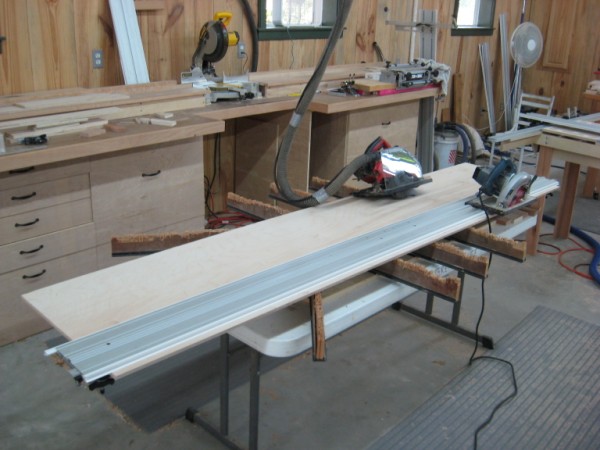
Mike Goetzke Replied:Here's what I have now, but, you know, nothing is final

:
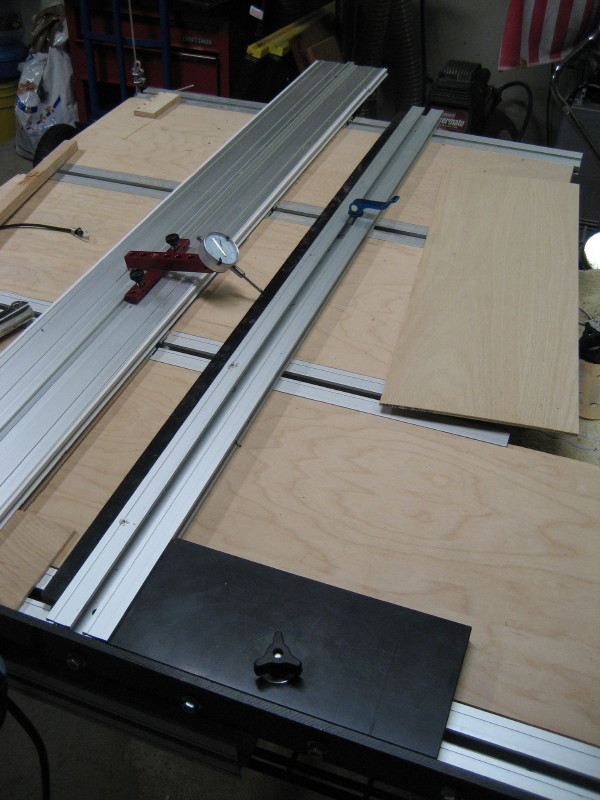
I used my TS alignment tool to check for parallel:
 Paul Greathouse Replied:
Mike
I like the improvements you've made. I'll probably be stealing some more ideas from you now. What thickness is the rectangular piece of UHMW that is attached to the sliding square and how is it attached?
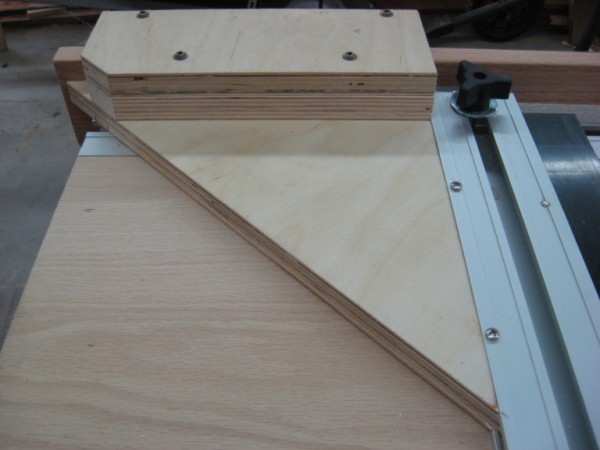
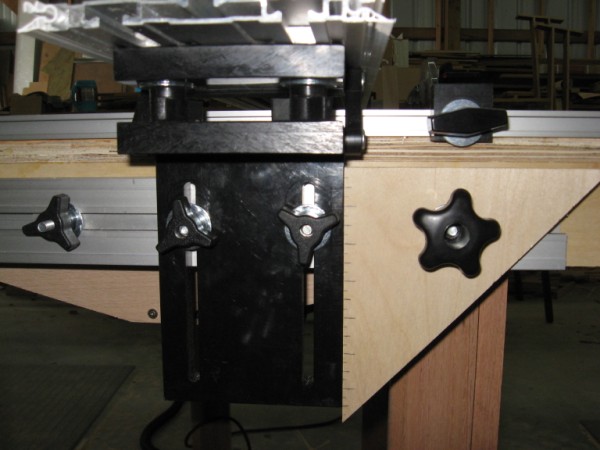
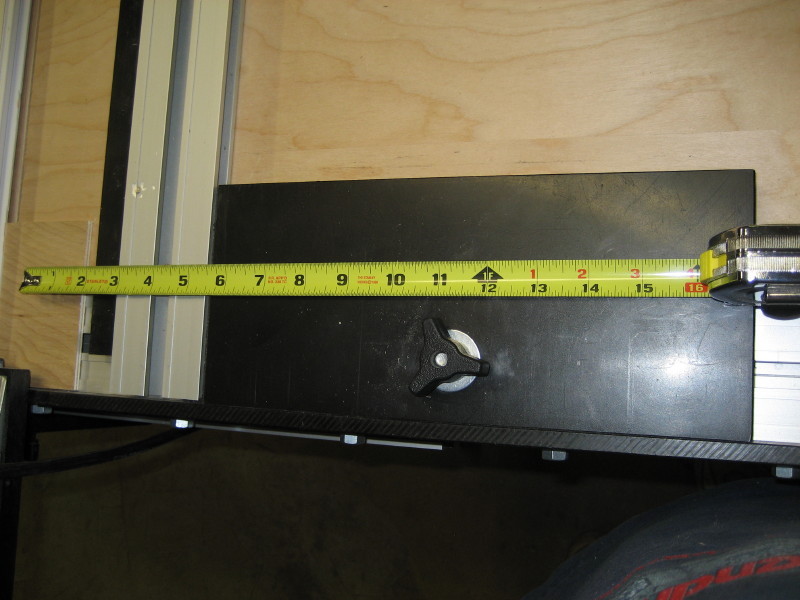
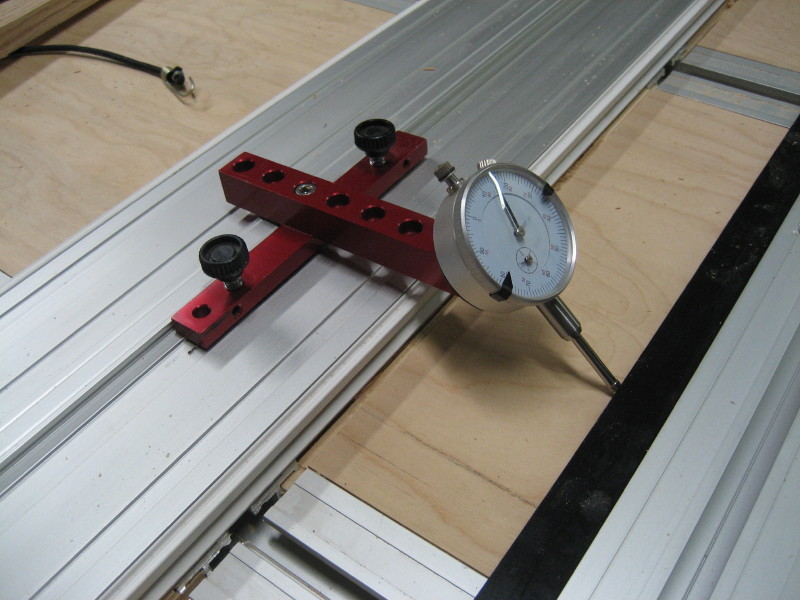
Mike Goetzke Replied:
It's about 11-12" x 4" x 3/4" (leftover piece). I milled one end to fit tightly in the SME extrusion with my router - no fasteners needed:

Originally I was going to make mine hook over my squaring fence like yours and use a couple of nylon thumb screws to tighten it from the outside of the squaring fence, but, 1) I ran out of UHMW and 2) I think the connector method has a hight clamp load.
Paul Greathouse Replied:
Thanks for the close-up shot, As they say a picture is worth a thousand words.
Good Luck
Bruce Benjamin Replied:How many ways are there to skin a cat? This is a very clever way and I'd say that cat done be skinned!

Nice job, Mike.
Bruce
Bill Griggs Posted:Paul,
I have been studying your PBB and would like to ask what the dimensions are? Also, now that you have used it for a while, would you change anything?
Your bench seems to be among the coolest.
Bill
Howard Phillips Replied:I can't answer for Paul, but I asked similar questions and you many find some answers here:
http://www.sawmillcreek.org/showthread.php?t=98607Paul Greathouse Replied:
Bill,
I'm just now finding your question. I'll try to get some measurements tonight when I get home and I'll post them in this thread. Did the link that Howard provided answer your question about things I would change?
In addition, I've been trying to decide whether to get the upgrade to the B300 or just buy another B300 and keep my B200 for another table. Either way, I will eventually swap out to a B300 on this table. I don't necessarily need the height, I normally work with 4/4 or less material, but I think it would be easier to position pieces under the bridge rail
with a B300. I do alot of narrow rips for rails and stiles against my sliding fence. It can get tight between the bridge rail and the sliding fence on multiple pieces with the B200.
I took some measurements tonight. It has a 50 1/2" cut capacity between the squaring fence (the end that the saw parks on) and the sliding stop on the far end.
As you can see in the photos the tabletop is in 3 parts.
The widest piece on the squaring fence end is 60" x 15 1/4".
The middle piece is 24" x 12".
The far end piece is 24" x 15 1/4".
The SME on the far end is 72", it extends 24" past the top piece on both sides.
On the bottom the box sides that collect the dust are 3" tall and the tabletop frame that sits on top of the dust box is also 3" tall.
The SME's are attached to 3/4" ply that is lying flat on top of the tabletop frame.
The tabletop is 36" off the floor.
The bridge rail is 70".
Bill Griggs Replied:Thanks for the information Paul. I bought a used system off another member and it just arrived. I will be making a trip to Lowes in the morning for Plywood.
My track is only 64" long so I may have to change a few measurements. I also don't have a 72" long SME for the end piece. Why is this so long. What is the function?
Sorry for all the questions but the system seems to be versatile and some functions are not obvious.
Bill
Dino Makropoulos Replied:Bill,
You can get a small section of rail ( any size ) and stay with the system that works for you.
The 72" SME is best for squaring cuts.
The new PBB's can have the 72" capacity with extentions.
Paul Greathouse Replied:I went with the 50 1/4" cut capacity so that I could handle full width plywood and still have a little extra room for positioning the piece. I didn't want to deal with a cramped fit with just enough room to slide the sheet in. The 70" rail is almost a necessity for the cut capacity (50 1/4") that I wanted. It allows plenty of room to park the saw on one end and enough rail left on the far end to easily finish the cut.
The 72" SME was part of the original package that Dino was offering. When I ordered Dino suggested that I could go with a shorter SME to save some money because he had found that the 72" length may not be necessary for everyone. I decided to stay with the 72" SME just in case I ever needed the extra length. It does come in handy for supporting larger pieces of plywood at times but is probably not necessary for the majority of what I do but I would still do it the same knowing what I know now.
I think the original purpose of the longer SME was for squaring cuts on longer boards. I tend to still cut down my long stock with my CMS out of habit more than anything. I cut the board longer than necessary at the CMS because I haven't been able to adjust the snipe out of my thickness planer. After planing, I do a straight-edge rip on the PBB, then slide the piece over to the fence and make the final width cut. With two straight edges to work with I then make my final squaring cross-cuts on the PBB instead of going back to the CMS. By the time I am making the final squaring cuts the piece is 50" or less so a long SME is not necessary for my squaring cuts.
Something you may want to consider:
Purchase a 70" rail for your bridge so you can have a full width PBB. Also purchase a square and attach it to the 64" rail that you have. I have that setup for breaking down full sheets of plywood on my smart table. For me its easier to make a cross-cut or two on the smart table before going to the PBB.
Bill Griggs Replied:
Thanks again for all the help Paul.
I got a used system from another member and it may be missing a few items so I am trying to minimize my purchases. It looks like I have most of a B2550 system.
I have a:
64" Guide Track
(2) 48" SME
(4) 24" SME
(2) 14.5" SME
(2) 9" SME
50" SME rip fence with a tape measure
44.5" SME
27" SME
Dual flip stop
3 squaring stops
(2) B-200's
(2) Smart clamps
several connectors
It looks like I will need some long SME to build a system, plus a 72" rail. Do I need repeaters or a EZ Square right away?
Bill
Paul Greathouse Replied:
You won't need the repeaters for the PBB but they would come in handy if you wanted to join some rails togeather and make some long rips.
The square is not necessary for the PBB either but would be a good addition to the 64" rail if you get the 72" rail to replace it for the PBB.
Burt Wadell Replied:Bill,
If I recall correctly, the 64" rail will work on a 50 1/2" PBB with the B-200. I'm sure it won't work with the B-300.
Burt
Paul Greathouse Replied:
Bill
Hopefully I didn't mislead you on the bridge rail lenght. As Burt said the 64" should work but the 72" is just more
convenient as it allow more room to park the saw on one end a more room to finish the cut on the other side.
Bill Griggs Replied:
No. Paul, I understand. I have a system that will work in the short term. However to get the most functionality out of it, I will need to make a few changes.
I will probably set up the system as I have it and later make changes based on my experience. I am just trying to prioritize my purchases. Any and all suggestions will be appreciated.
I like both the dust collection slots and the sliding fence on your system. i will try and copy those. I will probably make a few parts on my CNC machine to make the build easier on the pocket. I am starting at a different point then most folks since I don't have a table saw but I do have a CNC router.
Fun times ahead.
Bill