[Warning: Long Post]
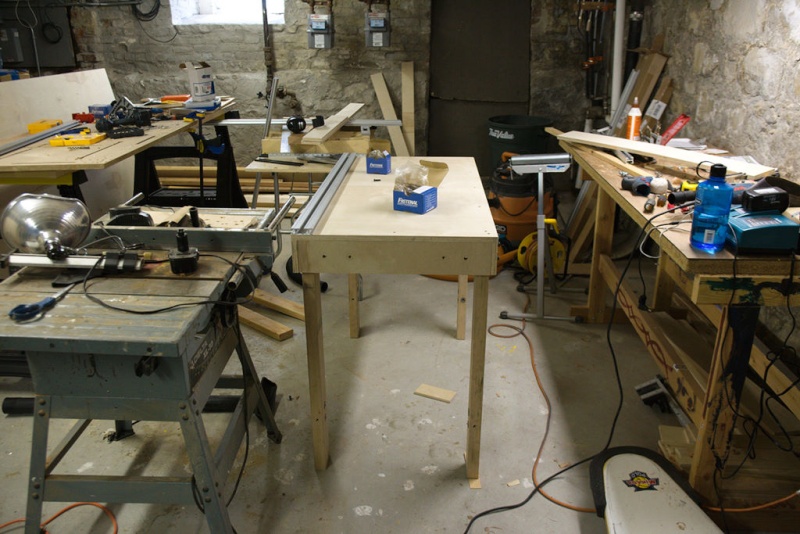
I finished the first version of my knockdown power bench made with T-nuts.
The only thing I have yet to do is stretchers for the legs.
The bench is made from a single sheet of 3/4 ply, 2 48" SMEs, 2
13"-15" cutoff SMEs (could just be 2 12"), a 2x4x12', many pocket
screws, and t-nuts/fasteners.
The top is 24"x48" and the torsion box is 4" deep. I picked an 11"
hole separation for SME mounting holes. This allows for 3 holes
on the 24" short side.
1/4" fasteners are used for the SMEs and 3/8 fasteners are used for
the legs.
Here is a picture of the underside of the top with all of the holes for
the top-mount SME T-nuts drilled. I "counter-bored" the holes with a
spade bit to make sure the t-nuts did not interfere with the box sides
and torsion ribs.

Here is a picture with the torsion box finished. There are additional
T-nuts for the side-mounted SMEs.
On the short end, I added a couple of 3/8" T-nuts to use for joining
benches together.

Here is a picture of the leg attachment, using the 3/8" bolts. I messed
up the placement of the leg holes and had to re-drill, which was a little
ugly.

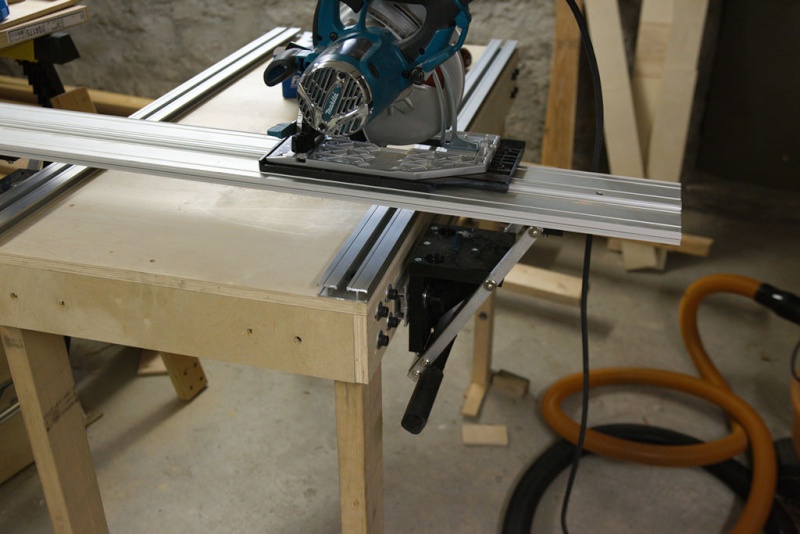
Here are a couple of pictures with the same SME on the long and short sides.
I used one of the 48" SMEs as a drilling guide and everything fits together
pretty smoothly. One thing I did was make the holes in the SME 3/8 for the
1/4 fastener to allow some wiggle room.


Here is the B300 mounted on the bench.

I screwed on my sacrificial top for now, but I might use the 1/4 holes with
some sort of block to lock it in in the future. The plywood is pretty warped,
so the screws are sort of necessary. I didn't see much point in routing a
tongue into the top (besides, it would have taken me longer to get to my
first cut!).
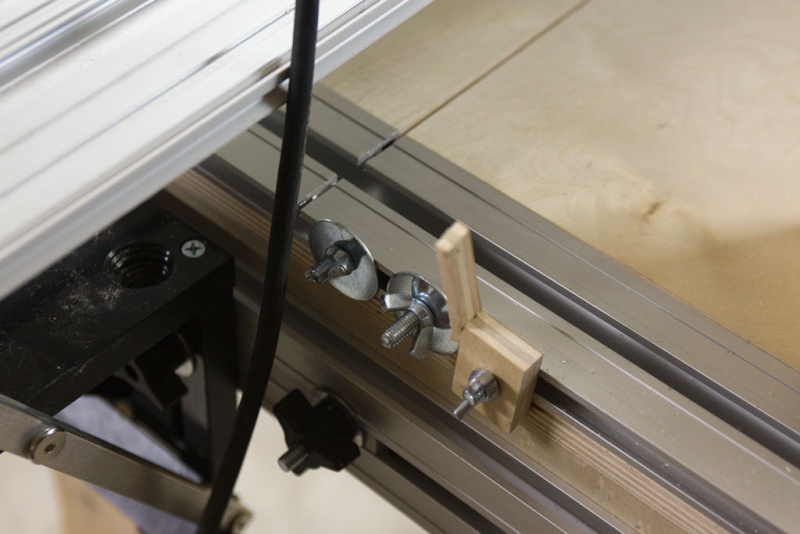
Last, here is the completed table with some of my shop-made stops. I have
knobs around instead of the wing-nuts, but I think it makes a great point.
Likewise, I think I have a small block of UHMW plastic that was used for
packing that I can make into a sturdier stop.

I thought I took more pictures, including the test cuts I made, but needless
to say, the results were great. I did a bunch of repeat cross-cuts and some
rips of narrow stock.
For a future design, I'd like to figure out a better setup for the legs. The
top is really sturdy, but the legs mounted directly to the sides of the box
puts a lot of stress on the 3/4" ply. Putting both top and bottom stretchers
on might alleviate this. A future design might be to have the legs as a
separate unit and have the top bolted/clamped on.
I might try putting it on top of the smart-table. I also did it the other way
around today and clamped the smart-table top to the PBB. I also have a skil
x-bench that might make a good base.
The other thing I need to work out is joining two tables together effectively
for long cuts. Using the bolts from the leg connections could work, but it
might be awkward to align things.
All in all, this has been a fun project and by far my most involved yet.
-Dave
